Before implementing Apple payments, ensure you understand the difference between Apple Pay and StoreKit. Apple Pay (often integrated via Stripe) allows users to pay for physical goods and services, while StoreKit is required for handling in-app purchases of digital or non-physical items.
In this post, we’ll focus on implementing StoreKit from scratch—without relying on third-party providers like RevenueCat to manage in-app purchases and subscriptions directly.
Apple store-kit Payment Flow 🔗
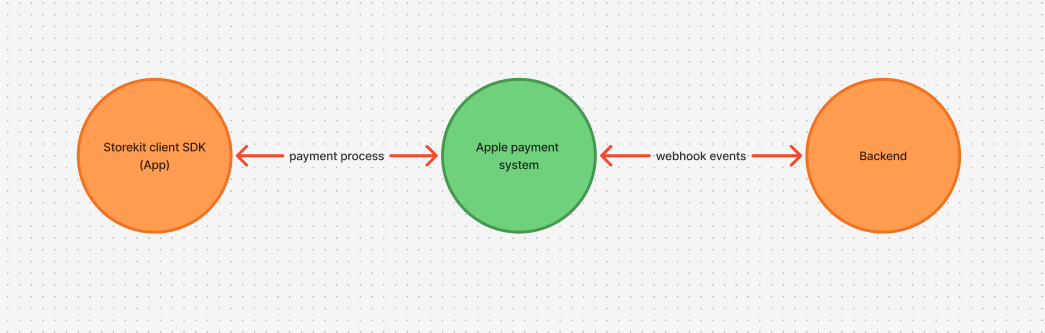
Unlike traditional payment systems, where the backend creates the order or subscription and passes its ID to the client SDK for payment processing, StoreKit works differently. In StoreKit, the payment flow is handled entirely on the client side through Apple’s StoreKit SDK. The client manages the purchase, and your backend receives the transaction response from the SDK for verification and entitlement updates.
Your backend receives payment state changes through Apple’s server-to-server webhooks, allowing you to update subscriptions and entitlements in real time.
Backend Implementation 🔗
From Apple’s payment implementation structure, I noticed it follows a more frontend driven and less backend controlled approach. However, I prefer a backend driven flow since our backend already manages multiple payment providers like Razorpay, PhonePe, and Apple Pay. I want Apple payments to follow the same unified logic, where the backend decides when to show the payment page and handles payment orchestration consistently across all providers.
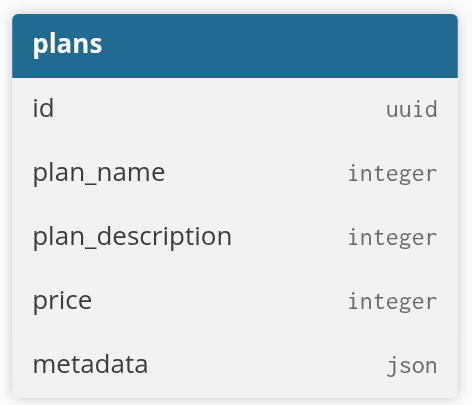
We also have a column named plan_type (on-time, subscription). Since we have payment handling for both type of payments but for apple we only implemented subscription payments
This is the Plan table, where I define all the plans users can choose. The table also includes a metadata field to store additional details such as apple_product_id and other provider-specific data.
Plans handling from Admin dashboard 🔗
Since we manage multiple payment providers across different platforms, we wanted all plans to be controlled from our main Django admin dashboard. This ensures consistency across providers and avoids giving everyone access to individual payment dashboards. Before implementing Apple payments, our business team could freely create plans and set pricing through our dashboard. But with Apple payments, you can’t create plans via their APIs—you have to manage them in App Store Connect manually (seriously, what kind of idea is that, Apple?).
To create plans, go to your App Listing page in App Store Connect. Navigate to Monetization > Subscriptions (for subscription-based payments) or In-App Purchases (for one-time payments). Create a Subscription Group, then add a Subscription Plan.
⚠️ Important: Make sure you fill out every required field on the plan creation and review pages. Otherwise, payments may work in the sandbox environment but will be rejected in production.
⚠️ I will be using subscription plan since we where doing subscriptions using apple pay.
Now that we’ve created the plan in Apple’s dashboard, we decided to remove the “create” functionality from our internal dashboard since, unlike other payment providers, Apple doesn’t allow plan creation through APIs.
We also had to adjust how we handle pricing in our Plan table. Previously, the team could set any custom price freely. But with Apple, pricing must be chosen from their predefined pricing tiers, which you’ll see when creating a plan in App Store Connect.
While Apple does provide APIs to update plan details, pricing changes must use the tier IDs Apple defines. So, if you want to set a plan price like ₹324, tough luck—Apple basically says, “nope, fk yourself.”
IOS app 🔗
Once all the plans are set up, the next step is integrating them into our iOS app. Since we’re using React Native, we rely on the react-native-iap package. Typically, you’ll need to call the getPurchase (or equivalent) function from the SDK before initiating a payment request with StoreKit.
The only thing the iOS StoreKit SDK actually needs is the apple_product_id, and from there it can start the payment flow. At this stage, all transactions run in the sandbox environment. You won’t get access to a true production environment until your app (with StoreKit integration) is submitted for review and approved by Apple.
Testing StoreKit can be a real pain. To test sandbox payments, you’ll first need to create a Sandbox Apple Account from your Apple Developer account.
Go to: Developer Account → Users and Access → Sandbox Accounts, and create a new test account to use during payment testing.
To use the sandbox account on the client, you’ll need to sign in with it from your App Store settings. The exact steps vary across iOS versions, so you may need to look up the instructions for your device version.
Handling payment in Backend 🔗
All state changes in StoreKit are pushed to your backend through webhooks. Just a reminder, make sure you’re using StoreKit 2, since StoreKit 1 is deprecated and no longer supported for new apps.
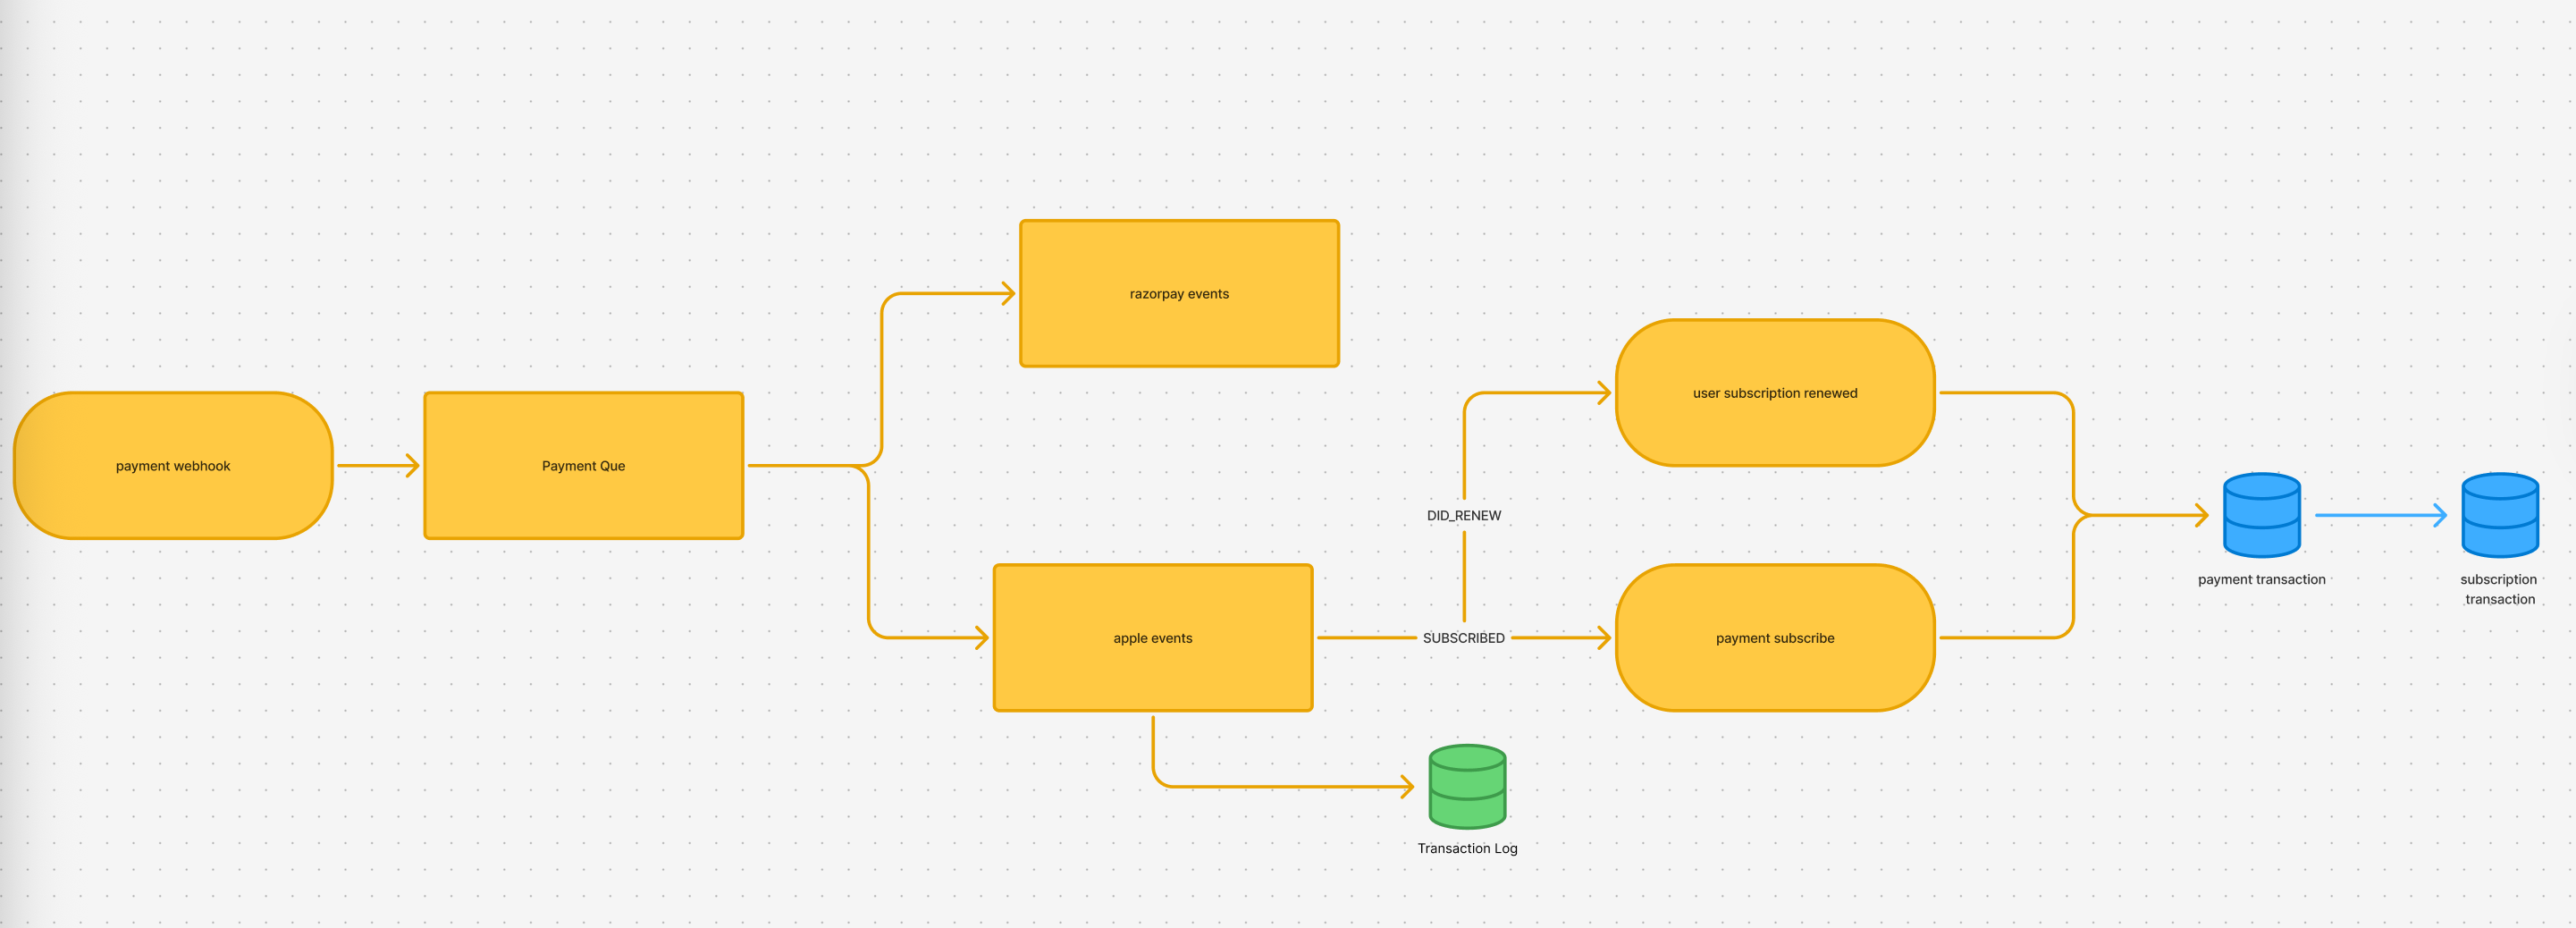
As you can see, We push all incoming webhooks into a queue, where a worker picks them up and processes them asynchronously. For our use case, I mainly handle the SUBSCRIBED and DID_RENEW events, since these confirm that a user has paid for their subscription. Depending on your business needs, you can extend this to include other events as well.
We store all incoming Apple events in a transaction log table (using ClickHouse). This allows us to backtrace logs and investigate any inconsistencies that might occur in the system.
All payment events are pushed into the payment transaction table. When a payment reaches the capture state (meaning we’ve successfully received money from the user), we create a new entry in the subscription transaction table, which links back to the payment transaction.
The subscription transaction table keeps track of whether a user has an active subscription by storing the start date and end date of each subscription period.
Anyone starting with this flow will naturally ask: “How do I map these transactions to a user?”
The answer is simple — you can pass an account_token to StoreKit when calling the request_purchase function. This token gets included in the transaction payload, allowing your backend to map the purchase back to the correct user.
Now, you might think: “Why not just pass the user_id as the account_token and call it a day?” Sadly, there’s a twist. All payments are tied to the user’s Apple account. So, if someone login to another Grapevine account using the same Apple account, things break — because for Apple it’s the same user, but for you it’s a different one.
That’s why Apple requires apps to include a Restore Purchases option. In our case, we store account_token as a separate column in the user table. When the user restores a purchase, we simply update the account_token to the new account and clear it from the old one, ensuring a smooth transition.